Knowledgeable Friendly Service • Massive Selection • Discount Pricing • World Class Art Supplies for Every Artist

Art Supply Fundamentals: Paint Basics

RSS
Art Supply Fundamentals: Paint Basics

Art Supply Fundamentals: Paint Basics


by Elizabeth Ragona. © 2025 Alabama Art Supply.

Choosing the right paint is essential for any artist, but with so many options available, it can be overwhelming. Ever stood in an art store, staring at rows of paint, wondering which one is right for you? Should you use fast-drying acrylics, rich, blendable oils, transparent watercolors, or matte gouache? What about craft paint—how does it compare to artist-grade options? And what should you use for kids' art projects?

Each type of paint behaves differently and knowing how they work will help you make the best choice for your style, budget, and project needs. In this guide, we’ll break down the most common types of paint—including artist-grade, craft, and children's paints—covering their unique properties, best uses, layering techniques, and preservation to help you create your best work.

Glossary of Paint Terms

Before diving into specific paint types, let’s define some key terms that will help you understand their differences:

Pigment – The colored particles that give paint its color and opacity.

Binder – The substance that holds pigment together and allows it to adhere to surfaces.

Dye – A colorant that dissolves in liquid, less permanent than pigment.

Lightfastness – A measure of how well a paint resists fading over time.

Matte – A finish with no shine or reflection.

Satin – A soft sheen, between matte and gloss.

Gloss – A shiny, reflective finish.

Neon/Fluorescent – Bright, vivid colors that react under UV light but may fade over time.

Interference/Iridescent – Paint that shifts colors depending on light and viewing angles.

Metallic – Paint that contains reflective pigments to mimic metals like gold or silver.

For more in-depth explanations, check out our Glossary of Art Terms and Color Theory Studio Notes™ Art Blogs.

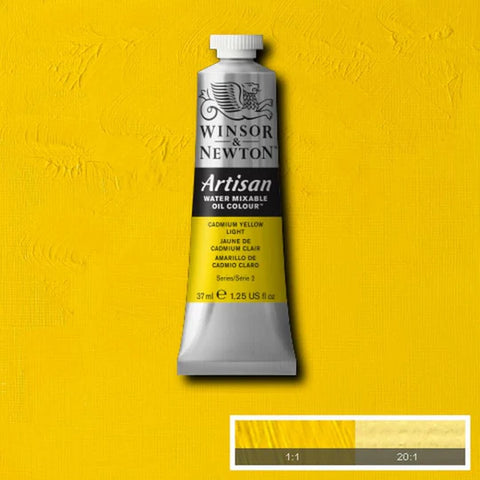
Artist-Grade Pigment Paints

When it comes to fine art and professional work, the quality of your paint directly impacts your results. Artist-grade paints are formulated with high concentrations of pure pigment and strong binders, ensuring richer color, better coverage, superior mixability, and long-term durability. Unlike craft or student-grade paints, they are designed to maintain lightfastness—meaning the colors resist fading over time.

These paints are ideal for professional artists, serious hobbyists, and anyone looking to create long-lasting, high-quality work. Whether you’re painting with watercolors, acrylics, oils, or gouache, understanding how these paints behave and how to work with them will help you achieve the best possible results.

In this section, we’ll break down the different artist-grade paint types, their unique characteristics, and how to choose the right one for your work. We’ll also explore the differences between professional and student-grade paints so you can decide which level is best for your needs.

Professional vs. Student-Grade Paints

When choosing artist-grade paints, you’ll come across two main categories: professional (or artist) grade and student grade. Both can be used for creative work, but there are key differences in pigment quality, color intensity, mixing capabilities, and longevity.

Professional-Grade Paints

✔ Higher Pigment Concentration – Professional-grade paints contain a greater percentage of pure pigment, meaning richer, more intense colors that require less paint to achieve full coverage.

✔ Better Lightfastness – The pigments used in professional paints are carefully tested for longevity, ensuring that the colors won’t fade or yellow over time.

✔ More Consistent Texture and Blending – These paints have smoother application and are designed to mix seamlessly without becoming muddy.

✔ Wider Color Range – Professional lines typically offer single-pigment colors, allowing for more control in color mixing and vibrant results.

✔ Higher Cost – Due to the high pigment load and superior binders, professional-grade paints are more expensive but last longer since you need less to achieve strong color.

💡 Best For: Professional artists, serious hobbyists, and anyone creating artwork meant to last for years or be sold.

Student-Grade Paints

If you're just beginning your art journey or shopping for supplies on a budget, student grade paint can be a smart and accessible option. Whether you're working with watercolor, acrylic, or oil, student grade paints offer an affordable way to experiment, practice, and grow your skills without breaking the bank.

✔ Lower Pigment Concentration – These paints contain more fillers and extenders, meaning the colors may appear weaker or less vibrant compared to professional-grade versions.

✔ More Affordable – Because of the lower pigment load, student paints are budget-friendly, making them great for beginners, classrooms, or practice sessions.

✔ Slightly Different Color Names – Some brands use different formulations for student vs. professional grades, so colors may not match exactly between the two.

✔ Limited Lightfastness – Some student-grade paints may fade over time, making them less suitable for artwork that needs to last for decades.

✔ Not as Smooth for Blending – Due to added fillers, these paints may not blend as smoothly as professional versions.

💡 Best For: Beginners, art students, classroom projects, or artists who need a more budget-friendly option for practice pieces.

How to Decide Between Professional and Student Paints

Choosing between professional (artist-grade) and student-grade paints can feel overwhelming, especially with so many options available in stores and online. Whether you're new to painting or ready to level up your art supplies, understanding the key differences between these two types of paints will help you make a smart investment in your creative journey.

  • If you’re selling or exhibiting artwork, go professional.
  • If you’re practicing or sketching, student-grade is a great choice.
  • For mixed media or casual projects, student-grade is often enough.
  • If you're on a budget but want higher quality, consider buying a few professional colors for key areas (like primary colors) and mixing them with student-grade paints.

💡 Pro Tip: Many brands offer both professional and student versions of the same color, so if you start with student-grade and want to upgrade, you can often find a direct match!

Professional vs. Student-Grade Paints: Key Differences

Here’s a comparison chart to make the differences between Professional and Student-Grade Paints easy to understand:

Feature Professional-Grade Paints Student-Grade Paints
Pigment Concentration High – richer, stronger colors Lower – more diluted color with fillers
Lightfastness (Fade Resistance) Excellent – colors last for decades Variable – some colors may fade over time
Blending & Mixing Smooth, retains color purity Can be muddy due to added fillers
Opacity & Coverage Stronger, better coverage May need extra layers for full opacity
Texture & Consistency Smoother, more fluid application Can be grainy or slightly uneven
Color Range Larger selection, more single-pigment colors Smaller selection, may contain color blends
Cost Higher price per tube/pan More affordable for practice & learning
Best For Professional work, fine art, archival projects Student projects, practice, casual use
Brands (Examples) Winsor & Newton Professional, Golden Heavy Body, Daniel Smith, Schmincke, M. Graham Winsor & Newton Cotman, Liquitex Basics, Van Gogh, Reeves, Sakura Koi

💡Pro Tip: If you're on a budget, consider buying professional-grade primary colors (red, blue, yellow, white, and black) and mixing them with student-grade paints to improve overall quality while keeping costs down.


Watercolor Paint

Watercolor paint is one of the most beloved and accessible forms of artistic expression. Known for its soft, transparent washes and luminous color, watercolor has captivated artists for centuries—from ancient manuscript illustrators to modern urban sketchers. But what exactly is watercolor paint, and why does it behave the way it does? Let’s explore the fundamentals of this versatile medium.

Artwork courtesy of Han Min Zaw Wirth, www.hanwirthart.com

Best For: Loose, fluid techniques, sketching, and layering.

Watercolor is one of the most fluid and expressive paint mediums, allowing for delicate washes, vibrant blends, and fine detail work. It is water-activated, meaning it can be reworked even after drying, making it unique among other paint types.

Unlike acrylics or oils, watercolor is transparent, meaning you build depth and intensity through layering rather than applying thick, opaque strokes. Because of this, light areas must be preserved from the start instead of being painted over.

Key Characteristics of Watercolor Paint

Watercolor is one of the oldest and most beloved painting mediums, prized for its ethereal beauty, portability, and expressive possibilities. But what sets watercolor apart from other types of paint like acrylic or oil? Here’s a closer look at the key characteristics that define watercolor and shape the way artists work with it.

Highly Transparent – Watercolor is known for its sheer quality, allowing light to pass through layers to create glowing, luminous effects.

Water-Activated and Rewettable – Unlike acrylics and oils, watercolors reactivate when wet, allowing for blending and correction even after drying.

Requires Watercolor Paper – Because it is water-based, watercolor must be used on special absorbent paper to prevent warping.

Soft Brushes Work Best – Watercolor brushes are designed to hold more water and pigment, allowing for smooth, flowing strokes without streaks.

Comes in Multiple Forms:
  • Tubes – More concentrated, great for larger washes and mixing.
  • Pans (Solid Blocks) – Convenient for travel and controlled pigment use.
  • Pencils – Draw dry and then activate with water for soft effects.
  • Sheets – Pre-mixed dried watercolor sheets (like Peerless Watercolors) that can be cut and used for small, portable projects.
💡 Pro Tip: Watercolor is best applied in thin layers (glazes) to create depth and vibrancy without muddying colors.

Watercolor Techniques

Watercolor is a unique and expressive medium, loved for its luminosity, spontaneity, and fluid grace. Whether you're just starting out or looking to deepen your practice, understanding and experimenting with a variety of techniques can open up new creative possibilities. Here’s a guide to foundational and advanced watercolor techniques to elevate your painting practice.

🎨 Wet-on-Wet – Apply water to the paper first, then drop in pigment for soft, blended effects.

🎨 Wet-on-Dry – Painting directly on dry paper allows for crisp, controlled edges.

🎨 Glazing – Layering thin washes to build up color gradually.

🎨 Salt Effects – Sprinkling salt on wet watercolor creates organic, textured patterns.

🎨 Dry Brush – Using a damp brush with little water for rough, grainy textures.

Video courtesy of Staedtler.

💡Pro Tip: Masking fluid can be applied before painting to preserve white areas—perfect for highlights, clouds, or fine details.


Best Paper and Brushes for Watercolor

When working with watercolor, your tools are just as important as your technique. The right paper and brushes can make a huge difference in how your paint flows, blends, and appears on the page. Whether you're a beginner or a seasoned artist, understanding what to look for in watercolor paper and brushes will help you paint with greater ease and confidence.

Paper: Use at least 140 lb. (300gsm) cold-press watercolor paper to prevent buckling. Hot-press paper is smoother and great for fine details. Click here for watercolor surfaces.

Brushes: Soft, natural-hair brushes (like sable, squirrel, or synthetic blends) hold water well and allow for smooth application. Click here for watercolor brushes.

Watercolor Paint Brands

With so many watercolor paint brands on the market, it can be overwhelming to know where to begin. Whether you're new to the medium or ready to upgrade your supplies, choosing the right brand can make a noticeable difference in color strength, flow, and overall painting experience.

In this blog, we break down some of the top watercolor brands—student and professional grade—so you can find the right fit for your style, needs, and budget.

Top Artist-Grade Watercolor Brands

  • Winsor & Newton Professional

Known for: Consistency, clarity, and availability.

Winsor & Newton has been a respected name in watercolors for over 150 years. The Winsor & Newton Professional Watercolor line features traditional pigments and smooth handling. A reliable choice with excellent transparency and color range.

Best for: Artists looking for tried-and-true colors with reliable performance.

  • Daniel Smith
    Known for: Vibrant pigments, rare minerals, and exceptional granulation.

Daniel Smith Watercolors offers one of the widest selections of professional-grade watercolor paints, including a PrimaTek line made from natural minerals like amethyst and serpentine. Their paints rewet beautifully and are a favorite among landscape and abstract painters.

Best for: Artists who want deep, rich, lightfast color and granulation effects.

  • Holbein
    Known for: Smooth, vibrant, and non-granulating formulas.

Holbeins watercolors are designed with clarity in mind. They are smooth and uniform—ideal for flat washes and illustration work.

Best for: Artists who need precision and clean, modern color.

  • Golden Artist Colors QoR Watercolors
    Known for: thick consistency, rich pigmentation, and archival quality.

QoR Watercolors by Golden Artist Colors are a refreshing addition to the watercolor world—offering stunning pigment intensity, smooth blending, and modern chemistry that respects the beauty of the traditional medium.

Best for: Artists who value high pigment intensity, modern innovation, and vibrant expression in their work

  • Schmincke Horadam
    Known for: German craftsmanship, easy rewetting, and luminous quality.

Schmincke’s artist-grade line is known for buttery-smooth handling and superior pigment strength. Each pan is poured multiple times for optimal consistency.

Best for: Artists who work in pans or value luxurious texture and color brilliance.

  • M. Graham
    Known for: Honey-based formula for moisture retention and vivid color.

M. Graham uses honey in their binder, keeping paints moist longer and easier to rewet. Their colors are richly pigmented and flow beautifully.

Best for: Studio artists who prefer working with creamy, tube-based paints.

Top Student-Grade Watercolor Brands

  • Winsor & Newton Cotman
    Known for: Quality on a budget.

Cotman is the student version of Winsor & Newton’s professional line. It has good transparency and decent pigment load, making it one of the best entry-level options.

Best for: Beginners who want a trustworthy, affordable brand.

  • Grumbacher Academy
    Known for: Pre-made palettes and trendy colors.

These affordable paints are popular among journaling and hobby artists. While not the most lightfast or permanent, they’re great for casual use.

Best for: Sketchbook work, journaling, or casual painting.

  • Van Gogh (by Royal Talens)
    Known for: Surprisingly strong pigment and performance.

These paints are often classified as a student/professional hybrid. Van Gogh offers vibrant colors and solid lightfastness at a reasonable price.

Best for: Intermediate painters or budget-conscious artists looking for more vivid color.

    • Sakura Koi
      Known for: Portability and convenience, beginner-friendly colors, travel and value.

    These paints are a popular and practical choice—especially for sketchbook artists, students, and travelers. Known for their compact design and bright colors, Koi sets make watercolor painting more accessible wherever inspiration strikes.

    Best for: Sketchbook work, journaling, or casual painting.

    💡Pro Tip: While professional watercolors offer better pigment load and longevity, student-grade options are great for learning and practice.

    ➡ For an in-depth guide, visit our Mastering Watercolor Painting Studio Notes™ Art Blog.

    Acrylic Paint

    Best For: Versatile techniques, fast drying, and mixed media applications.

    Acrylic paint is one of the most popular and adaptable painting mediums available. It is water-based, fast-drying, and incredibly versatile, making it a great choice for artists of all skill levels.

    Acrylics can be applied thinly, like watercolors, or thickly, like oils, and can be used on a variety of surfaces beyond traditional canvas—including wood, metal, glass, plastic, and fabric (with a medium).

    Unlike watercolor, which remains water-soluble after drying, acrylic paint dries permanently and forms a plastic-like film that resists water. This makes acrylic ideal for layering, glazing, and mixed media techniques, but it also means you must work quickly before the paint dries.

    Key Characteristics of Acrylic Paint

    Fast-Drying – Acrylic paint dries within minutes, allowing for quick layering but requiring speed when blending. If you need more time, slow-dry mediums can extend working time.

    Water-Based and Easy to Clean – Unlike oils, acrylics are non-toxic, water-soluble while wet, and easy to clean with just soap and water. However, once dry, they become waterproof.

    Highly Versatile – Can be used on canvas, wood, paper, metal, fabric, plastic, and more.

    Flexible Application – Can be thinned with water for watercolor effects or thickened with gels and mediums for heavy texture.

    Comes in Multiple Forms:
    • Heavy Body – Thick, buttery consistency, retains brush strokes.
    • Soft Body – Smoother, more fluid for fine details.
    • Fluid Acrylics – High-pigment, thin consistency, ideal for pouring techniques.
    • Acrylic Ink – Liquid form, great for airbrushing and calligraphy.
    • Acrylic Markers – Perfect for mixed media, adding detail over dried paint.
    • Acrylic Spray Paint – Excellent for urban art, stenciling, or large-scale projects.
    💡 Pro Tip: Use a wet palette to keep acrylics moist and workable longer. A simple DIY wet palette can be made using a damp sponge and parchment paper in a sealed container.

    Acrylic Painting Techniques

    This painting was made by combining poured acrylic paint with impasto painting. Image courtesy of Wikipedia

    🎨 Glazing – Layering thin washes of transparent color to create depth.

    🎨 Impasto – Using thick applications of paint (often with a palette knife) to build texture.

    🎨 Dry Brush – Applying paint with little to no water for rough, textured strokes.

    🎨 Pouring – Mixing acrylic with a pouring medium to create abstract fluid effects.

    🎨 Stippling – Using small dots of paint to create shading or texture.

    🎨 Sgraffito – Scratching through a layer of wet paint to reveal colors underneath.

    💡 Pro Tip: Acrylic mediums can completely change how the paint behaves—adding gloss, texture, transparency, or extending drying time. Experiment with different gels, pastes, and extenders to customize your paint.

    Best Surfaces and Brushes for Acrylic Paint

    Surfaces: Acrylics adhere well to canvas, wood, paper, glass, plastic, and fabric (with fabric medium). When painting on non-porous surfaces like metal or glass, use a primer like gesso or acrylic ground.

    Brushes: Stiffer brushes, such as synthetic or hog bristle brushes, work best for applying thick acrylics, while softer synthetic brushes are ideal for smooth blending and fine details.

    💡Pro Tip: Keep brushes wet while working with acrylics to prevent the paint from drying in the bristles. Once dried, acrylic paint is nearly impossible to remove from brushes.

    Acrylic Paint Brands

    Professional-Grade Student-Grade
    Golden Acrylics Liquitex Basics
    Liquitex Professional Acrylics Amsterdam Standard
    Winsor & Newton Professional Grumbacher Academy Acrylics
    Atelier
    Winsor & Newton Galeria Acrylics

    💡 Pro Tip: If you're on a budget, invest in professional-grade primary colors, white, and black, and mix them with student-grade colors for improved vibrancy and longevity.

    Acrylic Paint Safety and Cleanup

    ✔ Non-toxic and water-based, making them safer than oil paints.

    ✔ Always clean brushes immediately—once dry, acrylics are difficult to remove.

    ✔ Use ventilation when airbrushing, spraying, or using acrylic varnishes.

    ✔ Avoid rinsing paint down the drain—dried acrylic can clog pipes. Instead, let excess paint dry on a palette before disposing of it in the trash.

    💡Pro Tip: For easy cleanup, keep a jar of water nearby and rinse brushes frequently to prevent acrylic buildup.

    Acrylics are one of the most adaptable and user-friendly paint types, offering both quick-drying convenience and limitless creative possibilities. Whether you're working on fine art, mixed media, crafts, or large-scale murals, acrylics provide durability, flexibility, and bold color for any project.

    Oil Paint

    Best For: Rich blending, deep color, and traditional painting techniques.

    Oil paint is one of the oldest and most revered painting mediums, known for its slow drying time, rich texture, and unparalleled blending capabilities. Artists from Rembrandt to Van Gogh have relied on oil paint to create works with depth, luminosity, and lasting beauty.

    Unlike acrylic and watercolor, oil paint is slow-drying, allowing for smooth blending, soft transitions, and intricate layering. It is pigment-rich, providing vibrant, long-lasting color. However, oil painting requires specific techniques, special surfaces, and additional materials such as solvents and mediums for thinning and cleaning.

    Key Characteristics of Oil Paint

    ✔ Slow-Drying – Unlike acrylics, which dry in minutes, oil paint can remain wet for hours to days, allowing for extensive blending and layering.

    Thick, Buttery Consistency – Oil paints can be applied thinly or built up in thick layers (impasto) to create texture.

    Exceptional Blending and Glazing – Because it stays wet for a long time, oil paint allows for seamless color transitions and transparent glazes.

    Rich, Vibrant Pigments – Oil paint has a higher pigment load than most other paints, resulting in deep, saturated colors that remain vibrant for centuries.

    Requires Special Thinners and Solvents – Unlike water-based paints, oil paint does not clean up with water. Artists must use solvents like mineral spirits or turpentine for thinning and brush cleaning.

    ✔ Oil Paint Comes in Tubes and Sticks – While most artists are familiar with oil paint in tubes, oil sticks (or oil bars) offer a unique way to apply paint directly to the surface. Oil sticks contain oil paint mixed with just enough wax to form a solid, crayon-like shape. They allow for gestural, expressive marks and can be blended with a brush or palette knife. Once applied, oil sticks dry just like traditional oil paint and can be used alongside regular oils.

    Video courtesy of Golden Artist Colors.

    💡Pro Tip: If using oil sticks, remove the outer skin before applying and store them in a cool place to prevent softening.


    Oil Painting Techniques

    🎨 Alla Prima (Wet-on-Wet) – A technique where layers are painted before the previous layers dry, often used for quick, expressive work.

    🎨 Glazing – Applying thin, transparent layers of color to create depth and luminosity.

    🎨 Impasto – Painting with thick, textured strokes, often using a palette knife.

    🎨 Scumbling – Lightly dragging a dry brush with opaque paint over a dry layer, creating a soft, textured effect.

    🎨 Underpainting – Creating a monochromatic base layer before applying full-color paint.

    🎨 Fat Over Lean Rule – To prevent cracking, each layer should contain more oil (fat) than the previous layer (lean), ensuring flexibility as the painting dries.

    💡 Pro Tip: Oils take weeks to fully dry and months to cure—always allow paintings to dry completely before varnishing.

    For more information about oil painting techniques, check out our Mastering Oil Painting Studio Notes™ Art Blog.

    Best Surfaces and Brushes for Oil Paint

    Surfaces: Oil paint works best on canvas, wood panels, and oil-primed paper. Never paint oils directly on raw paper or unprimed canvas—they will absorb the oil, weakening the structure. Gesso or an oil-based ground is required for proper adhesion.

    Brushes: Stiffer brushes, such as hog bristle brushes, work best for oil painting, allowing better control of thick paint application. Softer synthetic brushes are used for smooth blending and glazing techniques.

    💡 Pro Tip: A good oil painting setup includes palette knives for mixing and applying thick paint and rags or paper towels for wiping brushes.

    Oil Paint Brands

    Professional-Grade Student-Grade
    Winsor & Newton Artists' Oils Winsor & Newton Winton Oils
    Gamblin Artist Oils Gamblin 1980
    Richeson Oils Van Gogh
    Grumbacher Pre-Tested Artist Oils
    Holbein Artist Oils
    Rembrandt Oil Colors

    💡 Pro Tip: If you're on a budget, start with professional-grade primary colors, titanium white, and burnt umber, and mix your own hues. Higher-quality white paint makes a big difference in color mixing.

    Oil Paint Safety and Cleanup

    Use a Well-Ventilated Space – Many oil mediums and solvents release fumes. Work in an area with good airflow or use odorless mineral spirits.

     Dispose of Rags Safely – Oily rags can spontaneously combust if stored improperly. Always lay them flat to dry before disposal or keep them in a sealed metal container.

    Never Rinse Brushes Down the Sink – Oil paint does not dissolve in water. Instead, wipe off excess paint with a rag, clean with solvent, then wash with soap and water.

    Avoid Skin Contact – Some oil paints contain toxic pigments (like cadmium or lead white). Wear gloves if handling paint extensively.

    💡Pro Tip: To avoid solvent use, try water-mixable oil paints, which clean up with water but still behave like traditional oils.

    Drying Time and Preservation

    Oil paint dries by oxidation, not evaporation, meaning exposure to air is required for curing. Thin layers may dry in a few days, while thicker applications can take months.
    Varnishing should only be done after the painting has fully cured—which can take 6 months to a year for thick paintings.

    💡 Pro Tip: If you need oil paint to dry faster, use an alkyd medium like Liquin, which speeds up drying time without compromising flexibility.

    Why Choose Oil Paint?

    Oil paint is ideal for artists who want rich color, long blending time, and lasting results. It requires more patience and preparation than acrylic or watercolor, but the results are unmatched in depth, texture, and vibrancy.

    Alternative Oil Paints: Water-Soluble and Alkyds

    For artists looking for oil-like properties with different working characteristics, there are modern alternatives that offer distinct advantages in drying time, cleanup, and texture.

    Water-Soluble Oil Paints

    These are real oil paints modified to mix with water instead of solvents. They maintain the slow drying time, blendability, and rich color of traditional oils but allow for easy cleanup with soap and water. Many artists prefer them as a safer alternative to solvent-based oils.

    Pros: No need for solvents, safer for home studios, behaves like traditional oil.

    Cons: Slightly different handling than regular oils, may dry faster than traditional oils.

    Alkyd Oil Paints

    Alkyd paints are fast-drying oil paints that use a modified oil binder, allowing them to dry in 24 hours instead of weeks. They retain the richness and depth of oils but make it possible to work in layers more quickly.

    Pros: Faster drying, great for artists on a deadline, compatible with traditional oils.

    Cons: Less open working time than regular oils, some brands may have a slightly different gloss level.

    💡 Pro Tip: Water-mixable oils and alkyds each have their own strengths—consider trying small sets of each to see which best fits your painting style.

    Gouache, Acrylic Gouache, Casein, and Golden SoFlat

    Asphodelus ramosus by Hans Simon Holtzbecker, 1649–1659, gouache on parchment. Image courtesy of Wikipedia.

    Best For: Illustration, opaque layering, matte finishes, and fine detail work.

    Gouache, acrylic gouache, casein, and GOLDEN SoFlat are highly pigmented, matte-finish paints that provide strong coverage and smooth application, making them favorites among illustrators, designers, fine artists, and commercial painters.

    Traditional gouache is water-based, opaque, and reworkable, combining the vibrant color of acrylic with the water-solubility of watercolor. It is widely used for flat, bold color applications, fine detail work, and layering.

    Acrylic gouache offers the same smooth, matte finish as gouache but dries waterproof, making it ideal for permanent layering and mixed media work.

    Casein (pronounced as kay-seen) paint, made from milk protein, shares gouache’s matte, opaque finish but dries to a harder, more durable surface, making it historically popular for commercial art, sign painting, and early 20th-century illustration.

    GOLDEN SoFlat is a matte acrylic paint designed for streak-free, ultra-flat color fields. It provides strong opacity like gouache but remains waterproof like acrylic, making it perfect for graphic work, murals, and contemporary fine art.

    These paints provide a range of options for artists looking for flat, vibrant color—whether they need rewettable flexibility, waterproof durability, or long-term stability.

    Key Characteristics of Gouache

    ✔ Opaque and Matte – Unlike watercolor, gouache fully covers underlying layers, making it great for bold shapes, clean lines, and graphic work.

    Reactivates with Water – Like watercolor, dried gouache can be rewet and adjusted—but it has a higher pigment load, making it richer and more opaque.

    Blends Like a Dream – Because it stays wet for a short time, gouache allows for smooth color transitions and soft shading.

    Can Crack in Thick Layers – Unlike acrylic, gouache is not flexible when dry, so thick applications may crack—best used in thin, even layers.

    Works on Various Surfaces – Gouache can be used on watercolor paper, illustration board, and toned paper, but is not ideal for canvas.

    💡Pro Tip: If you want more durable, water-resistant gouache, consider using acrylic gouache (discussed below).

    Key Characteristics of Casein Paint

    Matte, Opaque Finish – Like gouache, casein dries to a smooth, flat surface but hardens over time, making it more durable.

    Water-Soluble but Permanent – When wet, casein acts like watercolor or gouache, but once dry, it becomes waterproof and more resistant to reworking.

    Great for Underpainting – Casein’s fast-drying, velvety surface makes it an excellent base layer for oils and acrylics.

    Popular for Illustration and Commercial Art – Casein was widely used by 20th-century illustrators before the rise of acrylics, thanks to its fast drying time and smooth application.

    💡Pro Tip: Casein paint requires a rigid surface like illustration board or panel—it can crack on flexible materials like canvas.

    Acrylic Gouache: The Best of Both Worlds

    Acrylic gouache is a hybrid between gouache and acrylic paint, offering the flat, matte look of gouache with the permanence of acrylic.

    Dries Waterproof – Unlike traditional gouache, acrylic gouache does not reactivate with water once dry.

    Highly Pigmented and Matte – Colors remain bold and opaque without glossiness.

    Layering and Blending – Can be layered without disturbing previous layers—a major advantage over traditional gouache.

    💡Pro Tip: Acrylic gouache is perfect for mixed media artists, as it won’t lift or smudge when painted over.

    Key Characteristics of GOLDEN SoFlat Matte Acrylic

    GOLDEN SoFlat is a highly pigmented, ultra-matte acrylic paint designed for smooth, opaque, and streak-free coverage. It is often compared to acrylic gouache due to its rich, flat finish but dries permanently, making it a great alternative for artists who want the look of gouache with the durability of acrylic.

    Ultra-Matte Finish – Completely flat and non-reflective, perfect for bold color fields and graphic work.

    Highly Pigmented and Opaque – Provides strong coverage with fewer layers, making it ideal for fine art, illustration, and design.

    Smooth, Streak-Free Application – Self-leveling properties ensure even color without visible brush marks.

    Dries Waterproof – Unlike traditional gouache, once dry, SoFlat will not reactivate with water, making it great for layering and mixed media.

    Mixable with Acrylics and Mediums – Can be blended with other Golden acrylics or used with mediums to modify texture and finish.

    Suitable for Various Surfaces – Works well on canvas, wood, paper, and primed panels.

    💡Pro Tip: For the flattest, most even application, use a soft synthetic brush or roller to minimize texture and maximize SoFlat’s seamless matte look.

    Best Surfaces and Brushes for Gouache and Casein

    Canson® Bristol (Smooth) Art Board, Natural White 

    Surfaces: Gouache and casein adhere best to watercolor paper, mixed media paper, and illustration board. Casein also works well on primed wood panels.

    Brushes: Soft synthetic or natural-hair brushes work best for smooth application—avoid stiff bristle brushes that can leave streaks.

    Gouache, Acrylic Gouache, and Casein Paint Brands

    Professional-Grade Gouache Student-Grade Gouache Acrylic Gouache Casein Paint
    Winsor & Newton Designers’ Gouache Reeves Liquitex Acrylic Gouache Richeson Casein
    Holbein Artists’ Gouache Arteza Holbein Acryla Gouache
    Schmincke Horadam Gouache Pelikan Turner Acryl Gouache
    M. Graham & Co. Artists' Gouache Caran d'Ache Lascaux Acrylic Gouache
    Daler Rowney Designers' Gouache Golden SoFlat Matte Acrylic
    Shinhan Professional Designer Gouache Tri-Art Acrylic Gouache
    Daniel Smith Extra Fine Gouache Royal Talens Acrylic Gouache
    Maimeri Artist Gouache Matisse Acrylic Gouache
    Nicker Poster Colour (Acrylic Gouache)

    Notes:

    • Turner Acryl Gouache: A Japanese brand known for its vibrant colors and smooth application.
    • Lascaux Acrylic Gouache: Offers a range of strong, opaque colors with a beautiful matte finish.
    • Tri-Art Acrylic Gouache: Known for its ultra-smooth liquid acrylic colors that dry to a uniform matte finish.
    • Nicker Poster Colour: A Japanese brand offering high-quality, ultra-fine gouache paints.

    💡 Pro Tip: If you want vibrant, reworkable color, go with gouache. If you need waterproof durability, acrylic gouache is the way to go. If you want something in between, casein is a great option.

    Which One Will You Love?

    Whether you prefer the reworkable charm of traditional gouache, the fast-drying durability of casein, the waterproof versatility of acrylic gouache, or the ultra-matte perfection of GOLDEN SoFlat, these paints offer bold, flat color and creative control that’s hard to beat.

    Each one brings something distinct to the table—rich opacity, smooth application, and a matte finish that makes your work pop without the gloss. These paints are ideal for illustrators, designers, and fine artists who want to explore beyond the typical look and feel of watercolor or acrylic. Once you find the one that fits your workflow, you might never go back.

    Craft Paints

    Best For: Decorative painting, home décor, furniture, and DIY projects.

    Craft paints are affordable, easy-to-use, and versatile, making them a popular choice for hobbyists, crafters, and DIY enthusiasts. Unlike artist-grade paints, craft paints contain more binders and fillers, resulting in a thinner consistency and less pigment concentration. However, they are formulated to adhere to a variety of surfaces, including wood, fabric, ceramics, glass, and metal.

    Craft paints are available in different finishes, from matte and chalky to high-gloss and metallic, allowing for a wide range of creative applications.


    Key Characteristics of Craft Paints

    ✔ Budget-Friendly and Accessible – Sold in small, affordable bottles, making them perfect for large projects, classroom use, and beginner-friendly applications.

    Easy to Use – Water-based and quick-drying, craft paints require no special solvents and can be cleaned up with soap and water.

    Versatile Application – Can be used on wood, glass, plastic, fabric, ceramics, and more with the proper surface preparation.

    Available in Multiple Finishes – Craft paints come in matte, gloss, metallic, pearlescent, chalky, and even textured finishes for decorative effects.

    Not as Lightfast as Artist-Grade Paints – Some craft paints may fade over time, especially when exposed to sunlight.

    💡 Pro Tip: If using craft paints for outdoor projects, choose one labeled “weatherproof” or “multi-surface” to ensure durability.

    Craft Paint Finishes and Their Uses

    Finish Type Appearance Best For
    Matte Soft, non-reflective surface Chalkboard effects, rustic décor, stenciling
    Gloss Shiny, reflective finish Signs, furniture accents, decorative pieces
    Chalky Ultra-matte, soft texture Shabby chic furniture, vintage looks
    Metallic Shimmery, reflective sheen Frames, decorative accents, mixed media
    Pearlescent Soft shimmer, not as reflective as metallic Jewelry boxes, ornaments, fabric painting
    Enamel Hard, durable surface Glass, ceramics, high-traffic areas
    Glitter Adds sparkle and texture Holiday crafts, children’s projects, ornaments

    💡 Pro Tip: Some craft paints require sealing with a topcoat or varnish for added durability, especially when used on furniture or outdoor projects.

    Fabric and Textile Paints

    Best For: For painting on clothing, tote bags, or textiles, specialized fabric paints are designed to flex with the fabric and resist washing.

    Fabric Paint vs. Craft Acrylics: Fabric paints contain a softer binder that allows them to move with the fabric, while standard acrylic craft paints may crack or stiffen unless mixed with a fabric medium.

    Heat-Setting Required? Some fabric paints require heat-setting with an iron to permanently bond to fabric fibers.

    Best Surfaces: Cotton, canvas, denim, and other natural fabrics.

    💡 Pro Tip: Always wash and dry fabric before painting to remove any sizing or chemicals that might prevent the paint from adhering.

    Popular Craft Paint Brands

    Brand Best For Notable Features
    DecoArt Americana General craft painting Wide color selection, smooth coverage
    Apple Barrel (Plaid) Budget-friendly crafts Matte and gloss options, good for kids’ projects
    FolkArt Decorative painting High-quality finish, specialty colors (chalk, metallic)
    Martha Stewart Crafts Home décor, multi-surface Durable, works on glass, fabric, metal
    Ceramcoat by Delta Ceramic & wood painting Rich pigmentation, easy blending
    Montana Cans (Spray Paint) Urban art, graffiti, murals High-pigment spray paint with excellent adhesion

    💡 Pro Tip: If painting on glass or ceramics, choose an enamel craft paint—it will cure for a stronger, more scratch-resistant finish.

    Common Uses for Craft Paints

    Furniture Refinishing – Chalk and enamel craft paints are perfect for revamping old furniture.

    DIY Signs and Home Décor – Matte, gloss, and metallic craft paints work well for wood signs, ornaments, and holiday décor.

    Textile and Fabric Painting – Fabric craft paints allow you to customize clothing, tote bags, and upholstery.

    Glass and Ceramic Painting – Enamel-based craft paints can be baked in an oven for a permanent finish.

    Kids’ Crafts and School Projects – Water-based craft paints are safe, easy to use, and wash off easily.

    Craft Paint vs. Artist-Grade Acrylics: What’s the Difference?

    Feature Craft Paint Artist-Grade Acrylic Paint
    Pigment Load Low (contains fillers) High (rich, concentrated color)
    Durability May fade over time Lightfast, long-lasting
    Surface Compatibility Multi-surface but may require primer Best for canvas, paper, wood
    Opacity Good coverage but varies by brand Strong, full coverage
    Flexibility Can crack on fabric without medium More flexible for varied applications
    Drying Time Fast-drying Varies by brand and medium
    Cost Budget-friendly More expensive but better quality

    💡 Pro Tip: If you need long-lasting color, opt for artist-grade acrylics instead of craft paint. However, for home décor, DIY projects, and temporary artworks, craft paints provide affordable and vibrant options.

    Craft paints are an essential tool for hobbyists, DIYers, and decorative artists, offering a huge range of colors, finishes, and specialty effects. Whether you’re painting wood signs, furniture, fabric, or ceramics, there’s a craft paint made for the job!

    Paint for Kids

    Best For: Early learning, sensory play, school projects, and beginner art exploration.

    Kids' paints are specially formulated to be safe, non-toxic, and easy to clean up, making them ideal for young children, classrooms, and beginner artists. These paints are often washable, quick-drying, and designed for little hands, allowing kids to experiment with color and creativity without worry.

    While kids' paints are not archival like professional paints, they provide a fun, mess-friendly introduction to art while building fine motor skills and creative confidence.

    Key Characteristics of Kids' Paints

    Non-Toxic and Washable – Designed to be safe for children, with water-based formulas that clean up easily from skin and clothing.

    Bright and Easy to Use – Comes in bold, ready-to-use colors that don’t require mixing.

    Fast-Drying – Helps prevent messes and allows for quick layering.

    Variety of Forms – Available in liquid, solid blocks, sticks, and even fingerpaint formulas.

    Not Archival – Colors may fade over time and are not meant for professional artwork.

    💡 Pro Tip: If using kids' paint on fabric, wood, or other surfaces, apply a sealer or topcoat to improve durability.

    Types of Kids' Paints and Their Uses

    Click here to explore our Kids & Beginners section – perfect for young artists and those just starting out!

    Paint Type Best For Notable Features
    Tempera Paint School projects, posters Smooth, opaque color, fast-drying, available in liquid and cake form
    Washable Tempera Mess-free creative play Wipes off surfaces easily, best for younger children
    Finger Paint Sensory play, early learning Thick, creamy consistency for hand painting
    Watercolor Sets Beginner painting Comes in pans or liquid, easy to layer
    Paint Sticks (Solid Tempera) Mess-free painting No brushes or water needed, dries quickly
    Acrylic Paint (For Older Kids) Canvas painting, craft projects More pigmented but not always washable

    💡 Pro Tip: Paint sticks are great for travel and classroom settings, offering vibrant color without the mess of liquid paint.

    Best Surfaces and Brushes for Kids' Paints

    Surfaces: Paper, cardboard, poster board, and non-porous surfaces like plastic trays for sensory play.

    Brushes: Soft, wide brushes for broad strokes and easy coverage.

    Sponges and Rollers: Great for stamping, texture play, and large-area painting.

    💡 Pro Tip: For toddlers, large grip brushes make it easier to hold and control paint strokes.

    Popular Kids' Paint Brands

    Click here to dive into our Crayola collection – made for little hands and big imaginations!

    Brand Best For Notable Features
    Crayola Washable Paint General kids’ crafts Super easy to clean, comes in sets
    Prang Washable Tempera School & home projects Vibrant, affordable, smooth consistency
    Colorations Liquid Watercolor Watercolor projects Concentrated, great for blending
    Kwik Stix (Solid Tempera Sticks) Mess-free painting Dries in 90 seconds, no water needed
    Sargent Art Tempera Classroom use Bulk sizes, good coverage

    💡 Pro Tip: If gifting kids’ paints, include a paint shirt or apron to protect clothing!

    Fun Kids' Paint Activities

    Handprint and Footprint Art – Great for keepsakes and sensory exploration.

    Bubble Painting – Mix paint with dish soap and blow bubbles onto paper for a unique texture.

    Marble Rolling Art – Dip marbles in paint and roll them across paper in a box for abstract designs.

    Resist Painting – Use crayons, tape, or white glue to create designs that resist the paint.

    Splatter Art – Use a toothbrush or flick paint for fun, energetic designs.

    💡 Pro Tip: Let kids explore color mixing by giving them only primary colors (red, blue, yellow) and letting them create their own secondary colors!

    Kids' paints are a fun, engaging way to introduce children to the world of art, encouraging creativity, exploration, and early skill development. Whether painting with tempera, watercolors, or finger paints, kids can express themselves freely while learning the basics of color and texture.

    Paint for Murals and Urban Art

    1898 3rd Avenue North Alley. Image courtesy of Andy Jordan – Blank Space Birmingham

    Best For: Large-scale murals, outdoor artwork, graffiti, and street art.

    Murals and urban art have become a major movement worldwide, transforming public spaces, businesses, and neighborhoods with bold, large-scale paintings. Mural artists need paints that are fade-resistant, weatherproof, and adhere well to various surfaces like brick, concrete, and metal.

    While spray paint is the most recognized tool for street art, muralists also use brush-on acrylics and house paints, depending on the project’s surface, scale, and longevity requirements.

    Key Characteristics of Mural and Street Art Paints

    Sonya Faye’s Tailor & Clothier, 1709 3rd Avenue North. Image courtesy of Erica Chisolm.

    ✔ Highly Pigmented and Fade-Resistant – Must withstand sun exposure and weathering without fading.

    Durable and Adhesive to Multiple Surfaces – Mural paints must work on brick, stucco, concrete, wood, and metal.

    Multiple Application Methods – Artists use spray paint, brush-on acrylics, rollers, and airbrush techniques for different effects.

    Fast-Drying but Blendable – Street artists often layer colors quickly, requiring fast-drying paints with good opacity.

    Use Varnishes and Sealers for Longevity – Many murals require a UV-resistant topcoat to prevent fading and environmental damage.

    💡 Pro Tip: Brick and concrete surfaces should be primed before painting to create a smoother, more even surface for paint adhesion.

    Types of Paints for Murals and Street Art

    Paint Type Best For Notable Features
    Spray Paint (Aerosol Cans) Graffiti, detailed murals, fast coverage High-pigment, weatherproof, great for layering & blending
    Exterior Acrylic Paint Large-scale brush murals Flexible, fade-resistant, long-lasting
    House Paint (Latex Acrylics) Community projects, large coverage Budget-friendly, works well with rollers & brushes
    Airbrush Paint Fine details & smooth gradients Thin consistency, works with airbrush tools

    💡 Pro Tip: Spray paint allows for quick color transitions, while acrylic and house paints provide solid color blocks for large sections. Many artists combine both for different effects.

    Popular Brands for Mural and Urban Art Paints

    Brand Type Best For
    Montana Cans Spray Paint High-quality graffiti and mural work
    MTN (Montana Colors) Spray Paint Professional-grade street art
    Liquitex Spray Paint Spray Acrylic Water-based, low-odor, artist-grade colors
    Golden Mural Paints Acrylic High-pigment, outdoor durability
    Behr Premium Plus (House Paint) Latex Acrylic Cost-effective option for large areas

    💡 Pro Tip: For murals in high-traffic or outdoor areas, use a clear UV-resistant sealer to prevent fading.

    Mural Painting Techniques

    🎨 Freehand Spray Painting – Used by graffiti artists for fluid lines and shading.

    🎨 Grid and Projection Method – Artists use grids or project images onto walls to scale their designs accurately.

    🎨 Stencil Work – Allows for clean, repeatable designs and sharp edges.

    🎨 Brush and Roller Techniques – Perfect for backgrounds and large-scale murals.

    🎨 Drips and Splatter Effects – Used for expressive, abstract effects.

    💡 Pro Tip: When painting murals on textured surfaces like brick, use a stippling technique (dabbing with a brush) to push paint into crevices for even coverage.

    Best Surfaces and Preparation for Mural Paints

    Brick and Concrete – Requires a primer for smooth application.

    Metal – Needs a bonding primer before painting.

    Wood Panels – Sealing or priming prevents paint from soaking in too much.

    Canvas (for indoor murals) – Pre-stretched canvas allows murals to be created off-site and installed later.

    Use this Quick Reference Chart for choosing GOLDEN Acrylic Paints for Mural Use.

    💡 Pro Tip: Always clean the wall surface before painting—dirt, grease, or flaking paint can prevent good adhesion.

    Sealing and Protecting Murals

    Use a UV-Resistant Varnish – Protects against sunlight and fading.

    Anti-Graffiti Coatings – Some murals are coated with a protective layer that allows unwanted graffiti to be washed off easily.

    Regular Maintenance – If a mural gets scratched or damaged, artists often retouch and reseal it every few years.

    💡 Pro Tip: For outdoor murals, always check weather conditions before painting! High humidity and extreme temperatures can affect drying times.

    Murals and urban artwork bring life to public spaces and require durable, high-quality paints that can withstand time and weather. Whether working with spray cans, brushes, or rollers, mural artists must consider surface preparation, paint selection, and protective coatings to ensure their work lasts.


    Paint Comparison Chart: Choosing the Right Paint for Your Project

    Paint Type Opacity Finish Reworkable? Drying Time Best For
    Watercolor Transparent Matte ✅ Yes (reactivates with water) Fast (minutes) Loose washes, layering, fine details
    Gouache Opaque Matte ✅ Yes (can rewet) Fast Illustration, opaque layering, poster art
    Acrylic Gouache Opaque Matte ❌ No (dries permanent) Fast Illustration, mixed media, permanent layering
    Casein Opaque Matte ✅ Yes (briefly) Medium Sign painting, commercial art, underpainting
    Golden SoFlat Opaque Ultra-matte ❌ No (dries permanent) Fast Flat color fields, modern fine art, murals
    Acrylic Opaque to Transparent Satin to Gloss ❌ No (dries permanent) Fast Versatile fine art, mixed media, murals
    Oil Paint Opaque to Transparent Glossy ❌ No (permanent but slow drying) Slow (days-weeks) Traditional fine art, blending, texture
    Craft Paint Opaque Matte, Gloss, Metallic, Chalky ❌ No (dries permanent) Fast Home décor, DIY projects, crafts
    Kids’ Paint Opaque Matte ✅ Some rewettable Fast Classroom art, sensory play, posters
    Mural Paint (Acrylic & Latex) Opaque Matte to Gloss ❌ No (dries permanent) Medium to Fast Large-scale murals, street art
    Spray Paint Opaque Satin to Gloss ❌ No (dries permanent) Fast Graffiti, urban art, quick application

    How to Use This Chart

    • If you need rewettable paint, go for watercolor, gouache, or casein.
    • If you need permanent, flexible paint, acrylics or mural paint are your best bet.
    • If you want slow drying for blending, choose oils.
    • If you’re painting on non-traditional surfaces, mural paints, craft paints, and spray paints offer the most adhesion.
    💡 Pro Tip: Different projects require different paint types—experimenting with combinations (like acrylic + spray paint or gouache + casein) can lead to exciting results!

    Brushes and Surfaces by Paint Type

    Paint Type Recommended Brushes Best Surfaces
    Watercolor Soft natural/synthetic brushes (e.g., round, mop, liner) Watercolor paper (cold press, hot press, rough)
    Gouache Soft synthetic or sable brushes Watercolor paper, illustration board, mixed media paper
    Acrylic Gouache Synthetic brushes (flat, filbert, detail) Paper, wood, canvas, gessoed surfaces
    Casein Soft synthetic brushes or watercolor brushes Rigid surfaces like illustration board or wood panel
    Golden SoFlat Synthetic flat brushes, soft rollers Wood panel, canvas, paper
    Acrylic Synthetic brushes (round, flat, filbert, fan) Canvas, wood, paper, primed surfaces
    Oil Paint Hog bristle or stiff synthetic brushes, palette knives Oil-primed canvas or panel, gessoed wood
    Craft Paint Inexpensive synthetic brushes, foam brushes, sponges Wood, cardboard, glass, ceramic, metal, canvas
    Kids’ Paint Large grip brushes, sponge brushes, rollers Paper, poster board, cardboard, washable trays
    Mural Paint Synthetic brushes, paint rollers, spray cans Primed brick, concrete, wood, metal, large panels
    Spray Paint Spray nozzles, stencils, sponge tools Concrete, wood, plastic, metal, primed surfaces

    • Use separate brushes for different paint types to avoid contamination (e.g., don’t use your watercolor or acrylic brush with oil paint!).
    • For thick paints like oil and heavy-body acrylic, choose stiffer brushes or palette knives.
    • Soft brushes and smoother surfaces are best for detailed work and fine layering (e.g., watercolor, gouache). They also leave less texture when the paint dries.
    • Priming the surface (especially for murals or oil painting) ensures better adhesion and prevents long-term damage.

    Mixing, Blending, Layering and Preserving Your Paintings

    Understanding how to mix, blend, layer, and protect different types of paint will improve your results and extend the longevity of your work.

    Mixing Paints: Creating Custom Colors and Avoiding Muddy Colors

    Always mix from light to dark – Add dark colors gradually into lighter ones to maintain control.

    Use a limited palette – Mixing from primary colors (red, yellow, blue) improves harmony and avoids over-mixing.

    Know when to use opaque vs. transparent colors – Some pigments are naturally more transparent (like phthalo blue) while others are opaque (like cadmium red)—mixing them properly prevents dullness.

    Use a palette knife instead of a brush – Especially in oils and acrylics, this prevents streaky mixes and preserves color integrity.

    Acrylics and Oils – Use mixing mediums to extend drying time for easier color blending.

    Gouache and Watercolor – Mix with water, not white paint, to maintain luminosity (except when intentionally creating pastels).

    💡 Pro Tip: Test your mixed color before applying it to your final painting—sometimes colors dry slightly darker or lighter than expected.

    Blending Techniques for Smooth Transitions

    Wet-on-Wet (Watercolor and Oils) – Apply colors while wet to create seamless gradients.

    Glazing (Acrylic, Oil, Watercolor, Casein) – Apply thin, transparent layers over dried layers for depth and luminosity.

    Feathering (Gouache and Acrylics) – Use a dry brush or soft blending brush to create subtle fades.

    Finger Blending (Oils and Soft Pastel Work in Mixed Media) – In oil painting, some artists use fingers for natural blending, but gloves or barrier cream can help prevent skin exposure to toxic pigments.

    Use Retarders and Extenders (Acrylic and Oils) – Slow-drying mediums allow more time to blend.

    Work in Sections (Acrylics and Gouache) – Since acrylic and gouache dry fast, blend smaller sections at a time rather than the whole canvas.💡 Pro Tip: For smooth blends in acrylics, use a dry mop brush or soft synthetic blending brush—this softens edges without overworking the paint.

    Layering Techniques: Building Depth and Avoiding Lifting

    ✔ Fat Over Lean (Oils) – Each layer should have more oil content than the previous one to prevent cracking.

    Work From Transparent to Opaque (Watercolor and Acrylics) – Start with thin washes and gradually build up.

    Let Layers Dry Before Adding New Ones (Watercolor, Gouache and Acrylics) – Otherwise, underlying layers may reactivate (gouache) or pull up the previous layer (acrylic).

    Use Gel Mediums and Retarders for Acrylics – These help prevent streaking and make layering easier.

    💡 Pro Tip: To speed up drying between layers, use a hairdryer on a low setting (for watercolor and gouache) or a heat gun (for acrylics).

    Varnishing and Preserving Your Work

    ✔ Why Varnish? – Protects against UV rays, dust, and environmental damage, and enhances color depth.

    Choose the Right Finish:
    • Glossy – Makes colors vibrant, enhances contrast.
    • Matte – Reduces glare, best for soft effects (watercolor-like acrylics).
    • Satin – Balanced finish between gloss and matte.
    ✔ Watercolor and Gouache – Generally not varnished, but a spray fixative can protect delicate paintings.

    Acrylics – Use acrylic varnish (brush-on or spray) after paint is fully cured.

    Oils – Needs 6-12 months of drying time before applying final varnish. Use retouch varnish in the meantime.

    Murals and Outdoor Paintings – Apply a UV-resistant sealer for long-term durability.

    💡 Pro Tip: Use soft brushes or airbrush sprayers for varnishing to avoid brush marks.

    Why These Tips Matter

    Understanding how to mix, blend, layer, and preserve paint ensures your artwork lasts longer, looks more professional, and retains its vibrancy over time. Whether you're working with watercolor, gouache, acrylic, oil, or mural paints, mastering these techniques will help you get the most out of your materials.

    Practice Exercises: Try It Yourself!

    Now that you know the strengths, surfaces, and brush pairings for each type of paint, let’s put that knowledge into action. These quick, hands-on exercises are designed to help you explore how different paints behave—how they layer, blend, dry, and interact with surfaces.

    You don’t need a full studio or perfect setup—just grab what you have, follow the prompts, and see what you discover. Whether you're a student, a seasoned artist, or just getting started, these activities are a great way to build confidence and find your favorites.

    🎨 Watercolor

    Exercise: Glazing with Primary Colors
    Start with a wash of yellow, let it dry, then glaze over it with red, and finally blue. Watch how each layer builds a new hue without covering the previous one.

    💡 What you’ll learn: Transparency, layering order, and color mixing.

    🖌 Gouache

    Exercise: Opaque Still Life
    Paint a simple object using layers of gouache. Start with light colors, then build darker shapes on top. Try softening an edge with a damp brush.

    💡 What you’ll learn: Opaque layering, dry vs. rewet blending.

    🎨 Acrylic (Heavy Body or Soft Body)

    Exercise: Wet-on-Dry vs. Wet-on-Wet
    On canvas or mixed media paper, paint one stroke over dry paint and another into still-wet paint. Add a bit of gel medium to see how it changes blending.

    💡 What you’ll learn: Working time, texture control, and blending options.

    🖌 Oil Paint

    Exercise: Mini Fat-over-Lean Painting
    Create a tiny landscape with a thin underpainting (less oil), and let it set. Add richer, more buttery paint on top (more oil).

    💡 What you’ll learn: Drying behavior, proper layering, and pigment richness.

    🎨 Casein or Acrylic Gouache

    Exercise: Block Color Landscape
    Use flat color shapes to paint a scene—mountains, trees, or even abstract blocks. Try layering after each section dries.

    💡 What you’ll learn: Hard edges, fast drying, and surface feel.

    🖌 Craft Paint

    Exercise: Paint and Seal a Décor Sign
    Use a wood slice or signboard. Apply two different craft paint finishes (chalky + gloss). Seal one half to test durability.

    💡 What you’ll learn: Surface prep, finish variation, sealing effects.

    🎨 Kids’ Paint

    Exercise: Sensory Texture Collage
    Grab cardboard, string, bubble wrap, or anything textured. Let the kids paint with brushes, rollers, or fingers over and around it.

    💡 What they’ll learn: Color play, shape recognition, sensory creativity.

    🖌 Mural Paint

    Exercise: Design a Mural Section
    Prime a board or foam core with gesso. Sketch a design scaled to fit. Paint a background and one detailed element using a brush or roller.

    💡 What you’ll learn: Scaling, priming, tool control, and layout.

    🎨 Spray Paint

    Exercise: Stencil + Layer
    Cut a basic stencil (circle, leaf, logo) from cardboard. On a test surface like a wood panel or heavy paper, spray light layers.

    💡 What you’ll learn: Layer control, masking, and paint opacity.

    Conclusion: Finding Your Medium, Your Way

    There’s no one-size-fits-all when it comes to painting. Every artist has their own rhythm, their own preferences, and their own materials that just feel right. Whether you love the soft flow of watercolor, the flat pop of gouache, the durability of acrylic, or the richness of oil—understanding your tools is the first step to making them work for you.

    We hope this guide helps you make more informed choices about what to use and why—and inspires you to try something new. If you’re ever in doubt, visit us in-store or online. We’re happy to talk paint, paper, or which brush won’t leave streaks on your canvas.

    🎨 Happy painting, and don’t forget to tag us in your experiments using #yourartstore — we’d love to see what you’re working on.


    Alabama Art Supply is your one-stop shop for all things art! Whether you’re a beginner or a seasoned artist, we have everything you need to bring your creative vision to life. From paints and brushes to canvases, sketchbooks, custom framing, and more—if you’re looking for art supplies, we’ve got you covered. Don’t see what you need? Just reach out to us at 205-322-4741—we’re happy to help you find exactly what you're looking for!


    Tags: #yourartstore #arttips #arttechniques #artsupplies #birmingham #alabama #artist #creativeexpression #watercolor #painting #acrylics #oils #gouache #enamel #crafts #kids

    Previous Post Next Post

    • Elizabeth Ragona
    Comments 0
    Leave a comment
    Your Name:*
    Email Address:*
    Message: *

    Please note: comments must be approved before they are published.

    * Required Fields